DIY Video Marketing: Checklist For The Right Equipment And Tools On Any Budget
The below article provides several options for DIY folks looking to begin video marketing. You will see there are low, medium and large size budget options. Some of these items may contain affiliate links, however, each of these options has been reviewed and approved prior to being recommended.
Note: Level2Creative is here as a resource to you. We provide video marketing services with various pricing options should you prefer to have videos created for your marketing purposes. Give us a call today with any questions you may have:
(619) 356-3885
#1: Selecting the Right Camera
Don’t be intimidated when it comes to selecting camera equipment. Here are a few options for any budget.
Option One – Free
Use your very own smartphone. From iPhones to Samsungs might be good enough for your needs. Smartphones are especially good for shooting video on the fly. Simply find a good angle at the right height and you can begin recording. Be sure to look directly at the camera lens while you’re recording so as to appear as if you are looking directly at your viewers. Also, hold your camera in the landscape position rather than portrait. Most personal video is best shot just above eye level for the most flattering look. If held too low folks will be looking at your chin or chins which we all know is not a great look! And if you hold your phone too high to record it might look like you are trying to hide something.
Recording video on your phone will take up a lot of space. Be sure to transfer your files periodically to your computer to ensure you have enough space to record each time. One alternative to saving video files is Dropbox. If you’re a Mac user, AirDrop is a quick and easy way to transfer files between an iPhone and Mac.
Aside from your smartphone, an iPad or the built-in camera on your computer might work as well. Remember though that the best quality video use dimensions of 1920 x 1080.
Option Two – Small Budget
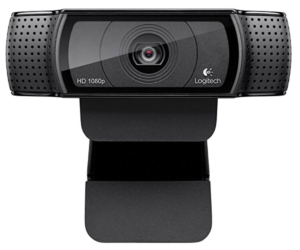
For those just starting our on a small budget, the Logitech C920 Webcam $50.11 for prime users (regular $99) is a good option. It produces HD video, attaches to your computer via a USB cable, and has a fitting to screw it into a tripod stand, which comes in handy. One downside is you can’t use this camera on the go because it needs to be attached via USB to your computer to work. You might want to consider taking your laptop with you, but often times this is not possible or easy to do.
It’s possible to download the Logitech Camera Settings app to your computer to alter the white balance, autofocus brightness and other settings. If you live outside of the US setting will be different due to different lighting frequencies – be sure to check on the Logitech site for proper settings.
Option Three – Bigger Budget
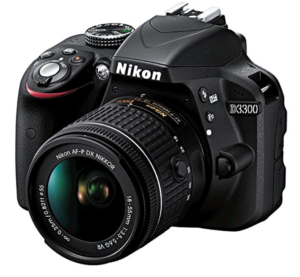
To take your video recording to the next level check out digital SLR cameras like the Nikon D3300 ($399.95 for prime users)
or the Canon Rebel T5 ($361.00 for prime users). Many vloggers use these cameras and they produce great-quality video.
#2: Stabilize Your Camera by using a Tripod
The proper right tripod will depend on the camera you’re going to use. This will help stabilize your camera to ensure it doesn’t shake or bounce while filming.
Option one – Free
In a pinch, you can use a shelf to place your camera on to stabilize it. Or perhaps a stack of books might also do the trick. If you’re using the Logitech C920 Webcam, you’ll find it sits nicely on top of your computer screen, and that might be just the right height.
Option two – Small Budget
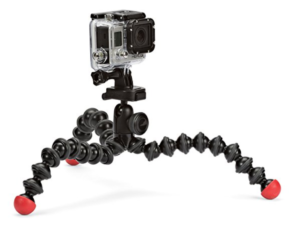
The Joby GorillaPods starting as low as $26.59 are fantastic flexible tripods if you have a small budget. The models are more expensive depending on the weight they will need to support
Option three – Bigger Budget
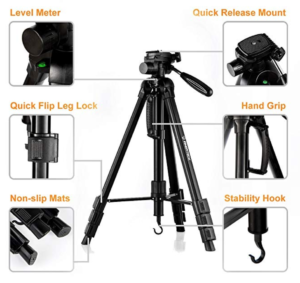
If you want a tripod that stands as tall as you, the InnerTeck 70-inch camera tripod/monopod with carry bag ($45.99) is worth considering. For a professional heavy duty video tripod kit with fluid head. This Kamisafe VT-1500 Adjustible Viedo Tripod Legs Stand for ($75.99) is another great option though it is a bit more expensive.
#3: Create Optimal Lighting Conditions Is Very Important For Shooting Good Video
You may have the most interesting video packed with great content but if you have bad lighting… your chances of someone sticking around long enough to view it is slim to none. Take a look at these lighting options to consider.
Option one – Free
All natural sunlight! And it’s the most flattering to people. All you need to do is find a location with as much natural sunlight as possible. You always have the option of using additional lighting if need be but keep in mind if the light isn’t fluorescent, it will likely cast an unnatural glow that you want to avoid if possible.
Try to have your face in as natural light as much as possible. Avoid having a light behind you as it could cast an unwanted silhouette.
Option Two – Small Budget
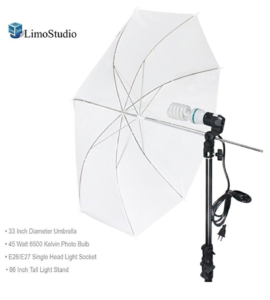
If you have a small budget, the LimoStudio Photography White Photo Umbrella Light Lighting Kit ($29.99) is a great option! It will be very flattering to your complexion.
Option Three – Bigger Budget
Ring lights quite simply make anyone look good. Here’s a good one if you have a larger budget: Diva Ring Light Nova 18″ Original Photo/Video Fluorescent ($159.00) and 6′ Light Stand ($39.95).
A photo umbrella helps create soft, flattering light for your videos.
#4: Consider Investing in a Quality Microphone
If you are going to be taking the time to develop good content for videos I highly recommend you invest a good microphone because when it comes to video there is nothing worse than a canned sound
Option one – Free
If you’re using your smartphone to record video, the microphone should provide ok audio but all the often the quality of sound is not very good. You an try to stand close to the phone and film in a quiet room. There should be no background noise or wind or traffic.
Option Two – Small Budget
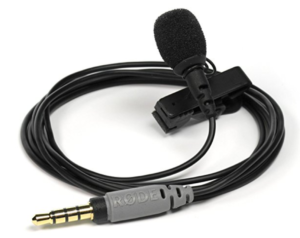
For a modest budget, consider the Rode smartLav+ Lavalier Microphone for iPhone and Smartphones ($74.80). This is a great option, especially if you’re filming outside or standing a short distance from your phone. You can also get a lavalier microphone splitter for $28.88, you can have two microphones for doing interviews..
Option Three – Bigger Budget
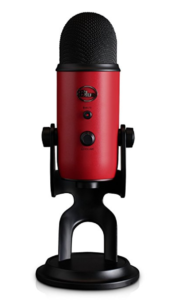
The Blue Yeti USB microphone ($129.00 ) is very popular among many vloggers and podcasters, and it’s a great choice if you have a larger budget.
Clip a lavalier mic to your clothing for hands-free operation.
It’s important to note that this model is extremely sensitive and will pick up the tiniest noise, vibration, knock on the table, footsteps, etc. You can minimize that unwanted noise, with bundle that includes the mic, desktop arm stand, and pop filter ($159).
#5: Set Up a Professional-looking Background
A nice background can set the scene and tone for your videos. Is it fun and friendly? Corporate and professional? Or does it just make you look amateur? Getting the right setup is important.
Option One – Free
You can try to use the existing space and background that you have such as a bookcase – office with some awards, etc might do the trick.
Option Two – Small Budget
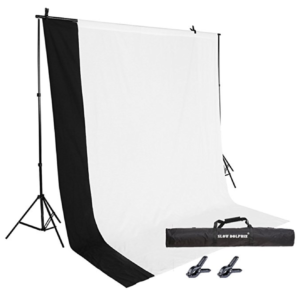
Finding a nice background for video shoots can be tricky, especially if you work from home. In this case, consider investing in a backdrop like the 6-1/2′ x 10′ Slow Dolphin Fabric Video Studio Backdrop Kit ($45.99).
A backdrop helps you eliminate clutter for more professional-looking videos.
Option Three – Bigger Budget
For a larger budget, a double-sized pop-up banner, maybe with some branding on it, would be suitable for a background. The price of these banners varies greatly, depending on the quality/size/finish and printing fees. Feel free to contact me directly at bethb@level2creative for more details on this.
#6: Select Video Editing Software
There are many good video editing options available at various price points, but HitFilm is one of the best values for the money. Here’s a rundown of some popular editing software options in order of free to most expensive.
Option one – iMovie
Available only for the Mac, iMovie (free) is easy to use and comes with a lot of useful features. It’s ideal for beginners.
Windows Movie Maker
Windows Movie Maker (free) is very basic and easy to use, and previously came standard with Windows PCs. However, Windows has now discontinued it so it isn’t a great future-proof choice.
HitFilm
HitFilm is our top recommendation, and it’s available at several price levels for both PC and Mac. At the highest end, the versatility and features are geared toward filmmakers.
However, the free version is ideal for beginners and more savvy video pros. It has more features than iMovie and is just as easy to use. To get the free version, you have to tweet/post about HitFilm, which is quite clever.
HitFilm’s free version has all of the editing features you need to get started with video.
TechSmith Camtasia
Camtasia ($249.00 ) is a simple tool that’s easy to pick up. It’s fairly versatile and can do screen recordings. You can get it for Windows and Mac.
Apple Final Cut Pro
Final Cut Pro ($99.99) is Apple’s upgrade from iMovie for Mac users. It’s powerful, versatile, and quick to use.
Adobe Premier Pro
Adobe Premiere Pro (239) is available for Mac, Windows, and mobile at a reasonable price tag per month if you’re doing lots of videos. It’s the most versatile option in this list, but it may be more robust than you need if you’re just starting out.

